Documenting your API with IODocs on Heroku
Neil Mansilla over at Mashery has created an awesome new system called IODocs, which can be used to create a system for browsing through OAuth-secured APIs. Being a Developer Advocate at LinkedIn, I decided to try and get this up and running with LinkedIn’s API. Since it was LinkedIn’s internal hackday on Friday, I decided to go the extra mile and try to build the configuration dynamically from our nascent discovery API system, and run it on one of Heroku’s node.js hosted systems.
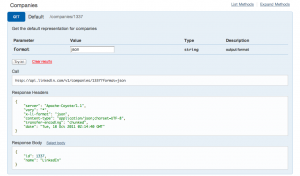
Thanks in part to a heavy piece of furniture (which fell on me on Friday, relegating me to bed rest for the weekend) I got it working. You can visit the LinkedIn API Documentation site and use your LinkedIn API key and secret to browse through the many API resources LinkedIn has to offer.
Getting the IODocs system running on Heroku required several steps, but once you have them it’s pretty straightforward. So I share them with you here so you can get IODocs running on your own Heroku instance, in the hopes that all of the OAuth APIs out there can leverage this functionality and improve developers’ lives.
Consider this an inclusive set of instructions to the ones they have on the site.
- Get “Local Workstation Setup” done from http://devcenter.heroku.com/articles/node-js
Do the initial IODocs setup <pre>% git clone http://github.com/mashery/iodocs.git % cd iodocs/ % npm install % echo “web: node app.js” > Procfile % cp config.json.sample config.json % vi config.json (remove address line)</pre>
- Add the following block under “var db;” to app.js: <pre>if (process.env.REDISTOGO_URL) { var rtg = require(“url”).parse(process.env.REDISTOGO_URL); db = require(“redis”).createClient(rtg.port, rtg.hostname); db.auth(rtg.auth.split(“:”)[1]); } else { db = redis.createClient(config.redis.port, config.redis.host); db.auth(config.redis.password); }
And then this in the Load API Configs section, after reading the config file:
var app = module.exports = express.createServer();
var hostname, port, password
if (process.env.REDISTOGO_URL) { var rtg = require(“url”).parse(process.env.REDISTOGO_URL); hostname = rtg.hostname; port = rtg.port; password = rtg.auth.split(“:”)[1]; } else { hostname = config.redis.host; port = config.redis.port; password = config.redis.password; }
</pre>
Add a LinkedIn block to public/data/apiconfig.json: <pre>“linkedin”: { “name”: “LinkedIn”, “protocol”: “http”, “baseURL”: “api.linkedin.com”, “publicPath”: “”, “privatePath”: “/v1”, “auth”: “oauth”, “oauth”: { “type”: “three-legged”, “requestURL”: “https://api.linkedin.com/uas/oauth/requestToken”, “signinURL”: “https://api.linkedin.com/uas/oauth/authorize?oauth_token=”, “accessURL”: “https://api.linkedin.com/uas/oauth/accessToken”, “version”: “1.0”, “crypt”: “HMAC-SHA1” }, “keyParam”:”” },</pre>
- Copy linkedin.json into your public/data folder
Set up your git repository for heroku <pre>% git init % git add . % git add -f config.json Procfile public/data/* % git commit -m “init”</pre>
- Set up heroku <pre>% heroku create –stack cedar; % heroku addons:add redistogo [note: this may require that you add a credit card to your heroku account. there is no charge, though] % heroku addons:add logging % git push heroku master % heroku ps:scale web=1</pre>
<pre></pre>
Once you’ve gotten all this set up, you’re ready to rock. Heroku will give you the right system name and port, and you can use ‘heroku logs’ to check the logs for the node.js server.
You can set up your own APIs using the config file – the IODocs documentation is fantastic, with OCD-level detail on how to set up configurations for new APIs, and I’m certain you can make it work with whatever you’re trying to use.
LINKEDIN · WEB APIS
heroku iodocs linkedin node.js oauth

